Useful Information
Bleed – Why It Matters in Print Design
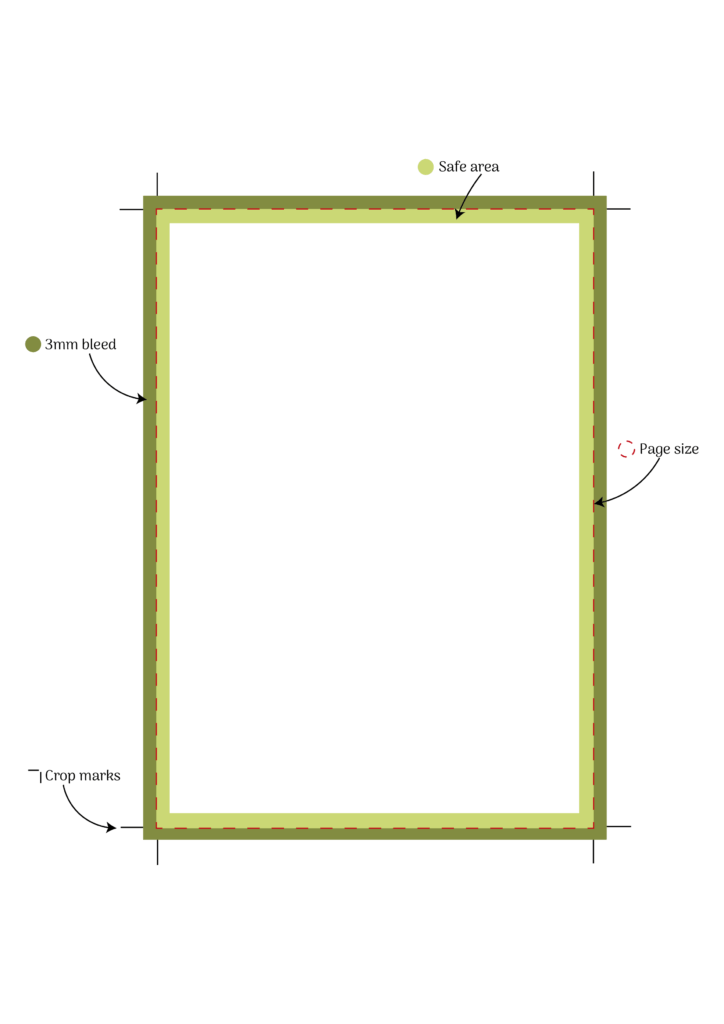
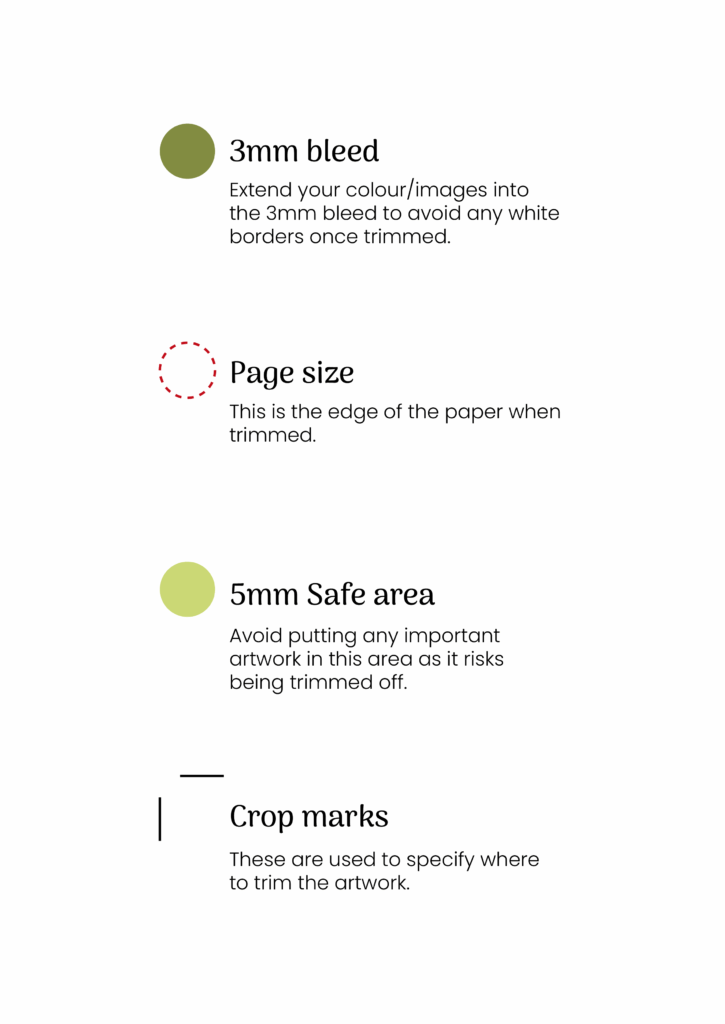
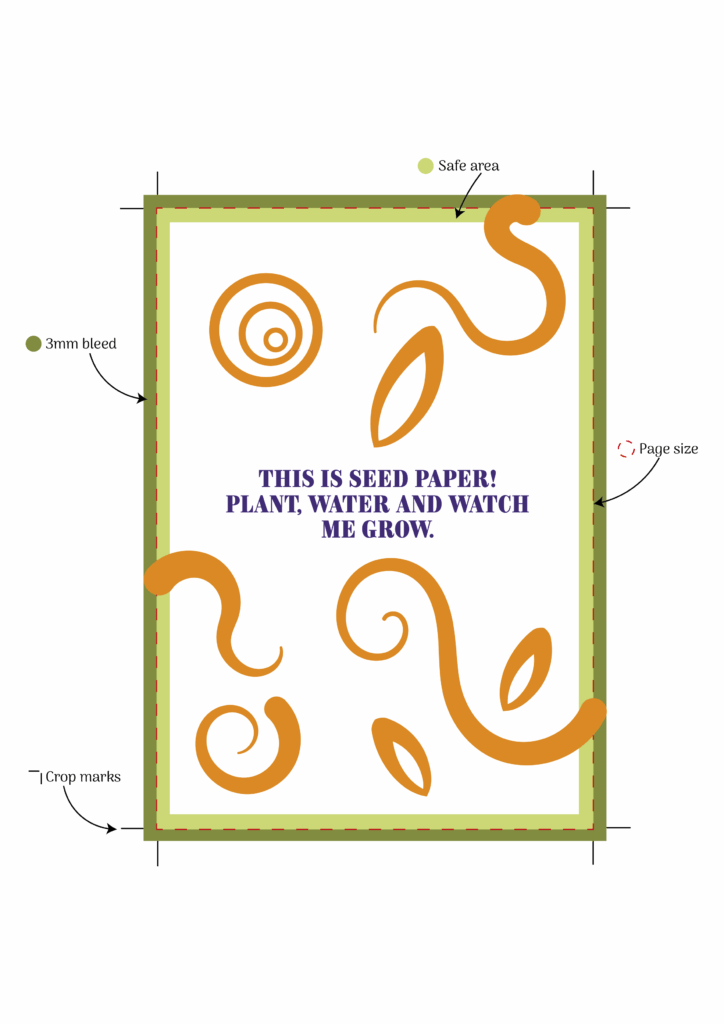
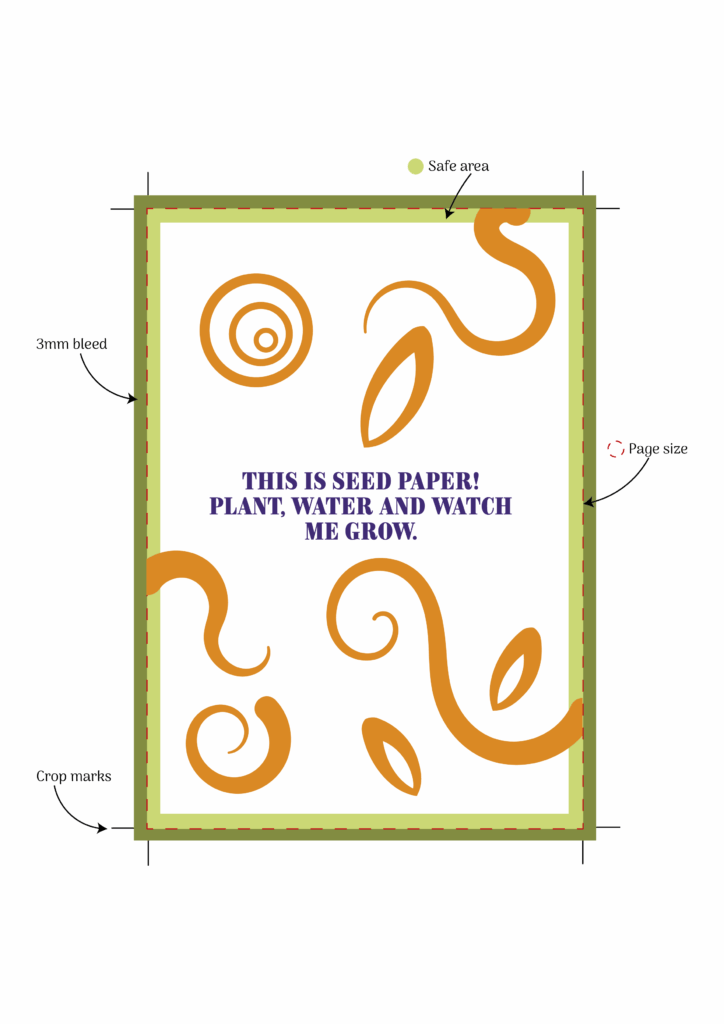
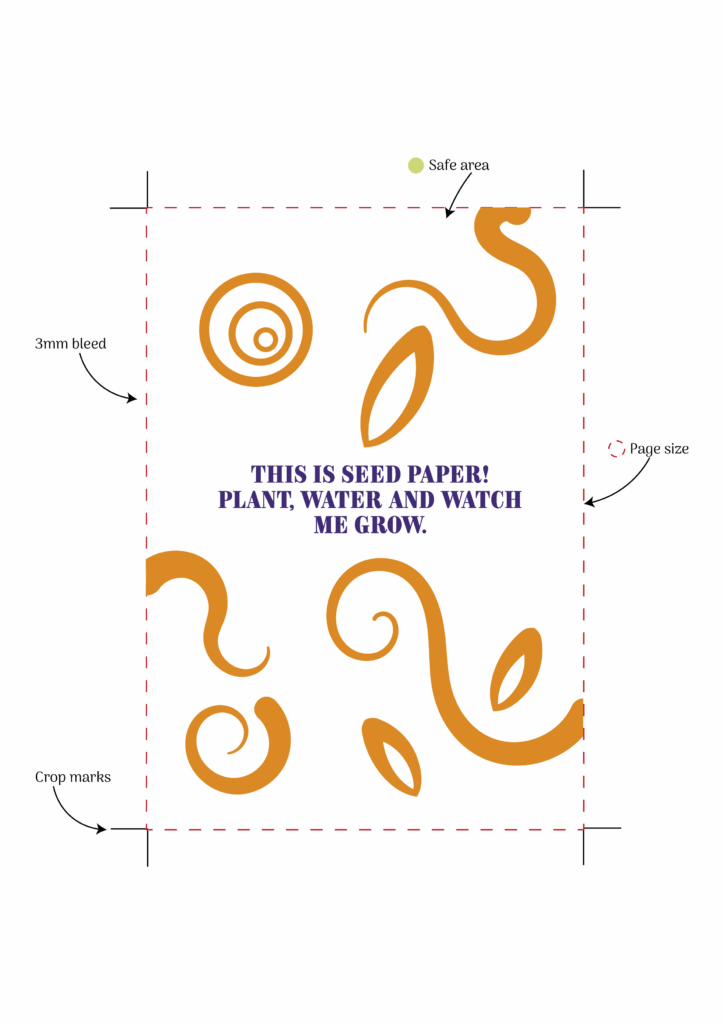
Bleed is a key element in preparing artwork for print. To ensure the final product looks clean and professional, we ask that all submitted files include bleed.
What is bleed?
Bleed refers to the extra space added around the edges of your design, which
is trimmed off during the finishing stage. Typically, this margin is 3mm on each side. Because trimming machines can’t guarantee pinpoint accuracy every time, bleed helps avoid unwanted white borders by giving a small buffer zone around your artwork.
How to add your bleed
Do I Need Bleed If My Design Doesn’t Go to the Edge?
If your design elements are all safely within the page and nothing extends to the edge, then there’s no need to include bleed. Bleed is only necessary when colours, images, or shapes are meant to run right to the edge of the final print.
Using Canva? Here’s How to Add Bleed Before Exporting:
To add bleed in Canva, go to File > View Settings > Show Print Bleed. Make sure your design extends fully into the bleed area if needed. Any background colours, images, or elements intended to run off the page extend right up to (or beyond) the bleed area. When you’re ready to export, choose ‘PDF Print’ as the file type, and tick the option for ‘Crop marks and bleed’ to ensure your file is print-ready.
Using Adobe Illustrator or InDesign? Here’s How to Set Up Bleed
Both Adobe Illustrator and InDesign make it easy to add bleed right from the start. When setting up your document, simply go into the Document Setup window and enter 3mm for the bleed on all sides. This will generate a red guideline around the edge of your canvas. This is your bleed area. Make sure any background colours, images, or elements intended to run off the page extend right up to (or beyond) this line.